

The 49th was raised in Queensland as a WWI Battalion and re-raised in 1940 with raw national service recruits (not previously trained in any Militia concept)1and was brought up to strength by September and was rated for “tropical service” in February 1941. The 39th, 49th and 55th/53rd Battalions formed the 30th Brigade. The following month the battalion sailed to the threatened islands north of Australia as part of the convoy that took the 2/22nd Infantry Battalion to Rabaul.
The troops were poorly trained and none of the training whilst in Port Moresby was orientated to jungle conditions. The Battalion spent many monotonous months mainly providing labour for working parties digging defensive positions and unloading ships’ stores. During this time the 49th’s morale was low and had reportedly the worst discipline in Port Moresby.
At the start of 1942 Japanese forces were rapidly advancing through south-east Asia and the Pacific. By March Japanese aircraft were attacking Port Moresby. They attempted to take Port Moresby by sea but their fleet was thwarted by the Battle of the Coral Sea.
The Japanese therefore planned to get to Port Moresby by a two-pronged attack at Buna on the north coast of Papua and Milne Bay (refer map in Appendix A). On 21 July the Japanese took Buna unopposed with a force of 1,500 and by 22 August had 11,300 men under arms.
The garrison at Moresby was strengthened to cope with the battles along the Kokoda Trail and at Milne Bay, yet there was little change to the 49th’s routine and their training remained basic.
On 11 July Alex was transferred to the 39th Battalion and embarked Sydney on 14 July for New Guinea. On 31 July he was transferred to 30 Brigade HQ and joined the 49th Battalion on 22 August as 2/IC of C Company.
In September the 49th provided troops from the short-lived Honner Force, which patrolled the Goldie River to prevent the Japanese from cutting the Kokoda Trail between Ioribaiwa and Efogi. The remaining 49th provided support by patrolling the area around the Goldie-Laloki Rivers. By November morale within the battalion had improved with more combat experience and jungle training.
The battle of Buna-Gona 15/11/1942 – 22/1/1943 followed the conclusion of the Kokoda Track campaign. Having pushed the Japanese back across the Kokoda Trail to the Kumusi River, the 16th and 25th Brigades and two inexperienced American regiments were engaged in pushing the Japanese back to the beachheads at Buna, Gona, and Sanananda.
“The Japanese forces conducted a ferocious rear-guard action and were skilful, well prepared and resolute in their defence. They had developed a strong network of well concealed defences. The resolve and tenacity of the Japanese was unprecedented and had not previously been encountered. It was to mark the desperate nature of fighting that characterised battles for the remainder of the Pacific war”.2
In addition several factors were not favourable in that there was a lack of information about Japanese troop strength which was seriously underestimated and the bush was so thick that attempts to traverse to the side of the Japanese flanks proved hopeless and fighting was confined to the main tracks.

By 20 November the 25th Brigade were a mile south of Gona and the Americans were approaching Buna. However, the 16th Brigade comprising the 2/1st, 2/2nd and the 2/3rd Battalions were suffering severe losses along the Sanananda Track having 130 officers and 196 ordinary ranks killed, 16 officers and 381 ranks wounded and 56 officers and 922 ranks evacuated sick representing 85% of the strength which it had set out with on the campaign. The struggle had worn out the 16th Brigade and it was therefore decided to relieve the 16th Brigade with the untried 30th Brigade.
At the end of November the 30th Brigade was flown across the Owen Stanley’s to reinforce the attack. Lieut-Colonel Kessels had his 49th Battalion with 24 officers and 481 men at Soputa dropping ground by nightfall of 4 December. The 55th/53rd Battalion landed at Dobodura and Popondetta (the main supply base and airport) the next day, and by the morning of the 6th had completed their movement to Soputa (the 39th Battalion had gone to Gona).
The 49th (24 officers and 481 other ranks) moved into attack position along the Sanananda Track on 6 December supported by the 55/53rd Infantry Battalion. The 49th’s four Companies, each about 100-men strong, attacked the next morning. Fortified and camouflaged, the Japanese fiercely resisted.
At 9.45am, as they went forward through the bush, Captain Forster’s company led on the right with Captain Bryce’s abreast on the left. Captain Noyes’ company followed behind Forster’s and Captain Thorn’s behind Bryce’s. All were quickly swallowed up in the bush.
Soon they began to lose very heavily. Forster’s men pressed on for some hundreds of yards and overran a number of Japanese positions. Forster himself was wounded but Lieutenant A. R. Tolmer (who had himself been slightly wounded the previous afternoon) carried on. All of the officers except Alex were killed. “Handicapped by a shortage of NCO’s he reorganised the company under heavy fire and pushed onto his company objectives” 3. He got one platoon of 40 men some 700 or 800 yards forward until they linked with Lieutenant Moore’s men of the 2/2nd who had been forming the right forward extremity of the Allied line.
On the left Bryce’s company were being badly torn by fire from Japanese positions sited on the left of the Track; Bryce himself was wounded. Lieutenant Unsworth, his second-in-command, took over although wounded and carried on until he was killed. Lieutenant Hughes was killed at the head of his platoon. The company seemed to lose direction slightly and veered too far to the right in the shrouding bush until finally all their impetus was gone”.
There was a lack of communication between the forward and rear companies and Colonel Kessels HQ as wireless sets had not arrived before the battle began. The war record stated:

“This lack of communications, the thick bush and the confusion of battle, made it almost impossible to synchronise the movement of companies as had been planned. As a result, the gap between Forster and Bryce in the front, and Noyes and Thorn in the rear, inevitably widened from the planned 200 yards. When Noyes and Thorn finally pushed ahead, they were some 500 yards in the rear of the forward companies and the Japanese had time to recover in some measure from the first onslaught before meeting the second.
On the right, part of Noyes’ company tangled (with the Japanese) early with Thorn’s men on their left. Both groups there were held and badly cut about. The rest of Noyes’ company staggered ahead with a great volume of fire pouring into them from their left. By the time they had covered about 800 yards only about 35 of the 98 in the company were still with the commander. All of the platoon commanders were down. But Noyes stayed in this new position for five hours until, having decided the day was lost, he brought his men back.
In the vicinity of the track Thorn’s men had at first pushed strongly ahead. Then fire smashed murderously through them from Japanese positions which had lain motionless beneath the first wave and from the left of the track where there were other positions. Thorn himself was killed with two of his lieutenants, Forster and Morrison, and many of his men. And so the attack of these brave companies crumbled”.
Alex after the war stated to Australian war biographers4 that “that during the war prior to this action, and battle experience afterwards he never saw again a greater volume of fire than what was directed at the 49th on 7 December”. It was a miracle that anyone survived. Alex had the pack shot off his back and received a bullet hole in the leg of his trousers.”
The attack failed and cost the 49th dearly. “The Battalion diary gives the strength of the companies as A Company – 9; B Company – 38; C Company – 11; D Company – 60. To these could be added the 40 who were still out with Tolmer to make a total of 158
In five hours the battalion lost 14 officers and 215 men killed or wounded. Close to sixty per cent of the attacking force, just under half of the battalion’s full strength, were casualties. The 49th killed losses were A Company – 9; B Company, 38; C Company, 11; and D Company, 60. Whilst the attack failed Alex remarked that the 49th was the first battalion to break through in this area.
The next day Lieutenant Gillespie relieved Alex who arrived back at Battalion HQ at 3.45pm and went immediately to the RAP. He had been wounded in the arm two days earlier from large splinters of mortar shell and “pleaded with the Regimental Medical Officer (RMO) to remove the shrapnel so he wouldn’t be evacuated from the battle zone. The RMO was attempting to do this with the two of them crouched down to avoid head-high small arms fire when the Deputy Director of Medical Services for 7th Division arrived to inspect the area. The DDMS ordered Tolmer to be evacuated immediately because the wound concerned was not a job for the RMO” 5. On 9 December Alex was listed as “wounded in action” and evacuated to the 2/9th AGH.
On 9 December Alex was promoted to the rank of Captain and on 12 December transferred by air to 6 Causality Clearing Station in Australia on 17 December and subsequently on 21 December transferred to the 117 AGH.
After this action a stalemate developed on the Track and it was not until the Japanese were defeated at Gona and Buna, releasing additional troops for the task, and together with reinforcements from Australia, the Track was taken and the Japanese abandoned Sanananda by 22 January 1943.
Alex said once to his nephew Peter Tilley “we slaughtered the Japs at Gona, Buna and Sanananda” but he didn’t say the Sanananda Track. The official war record states: “Although such killings might suggest that the Japanese fared badly in comparison to the Allied forces that defeated them along the Sanananda Track, this was far from being so. In that area alone the Australians and Americans lost in killed and wounded between 2000 and 2100 officers and men. Of these 1400 were Australian (634 from 3 militia battalions – 39, 49 and 55/53 and 426 from 18 Brigade battalions). Almost 600 were killed or missing. On the other hand, probably 1500-1600 Japanese were killed along the track, although many of these were wounded who had been left to die or fight to the death. The Japanese took off by sea probably about 1200 sick and wounded during the period 13-20 January, and about 1000 escaped overland to the west of Gona.

For his role in the battle the Battalion CO, the 30 Brigade CO and the CO of 6th Division recommended Alex be awarded the Military Cross (the third highest Australian bravery award) the full citation for which is detailed below together with a letter the Army wrote to his wife Norma informing her of the award which he received in a ceremony in Melbourne accompanied by Norma and his mother Lotte on 28 December 1943. Alex was also awarded a “Commendation Card” for acts of bravery and distinguished service in the South West Pacific during 1942.
On 16 January 1943 Alex marched into the 4th Infantry Training Brigade (4 ITB) only to be hit by another bout of malaria from the 2nd to the 10th of February. From 4 ITB he was transferred to 30 Brigade HQ on 6 March returning to the Battalion on 18 May
The battalion was finally relived in January 1943 and flown back to Moresby returning to Australia in March. In May the 49th’s Militia personnel were posted to the 12th Brigade, where most went to the 36th Infantry Battalion. The 49th was reduced to just 20 officers and
146 men. Shortly afterwards the 30th Brigade was absorbed into the 16th Brigade. Virtually all of the remaining 49th personnel merged with the 2/1st and on 3 July the 49th was disbanded. Alex was attached to the 2/4th Battalion on 16 July.
Members of the battalion received the following decorations: one DSO, three MCs, one DCM, three MMs and 10 Mentioned in Despatches.
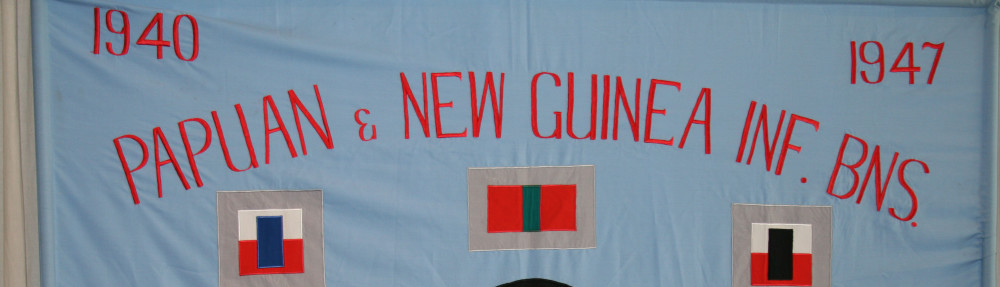
Battle Honours – Buna-Gona, Sanananda Road
MILITARY CROSS
Transcript of the original document – dated 28 December 1943
“Captain Tolmer was supervising the relief of an American Unit by 49 Aust Inf on 6 Dec 42, during which the Japanese put down a heavy mortar barrage and TOLMER was wounded in the arm by large splinters of bomb. He remained on duty and took part in Btn attack on 7 Dec 42, during which the Coy Comd and all officers were killed or wounded. Handicapped by a shortage of NCO’s, he reorganised the company under heavy fire and pushed onto his company objective. Capt TOLMER remained on duty for two more days, during which the company held their objective, before he went off duty. His example and leadership were outstanding. During training periods and action, this officer has exhibited exceptional energy and ability. He is a pattern for all junior leaders”.
Signed –
Lt-Col O A Kessels Comd 49 Aust Inf Btn,
Brigadier S H Porter Comd 30 Aust Inf Brigade and
Maj-Gen J E Stevens Gen OC 6 Aust Div
Recommended for periodical award of MC Signed – T A Blamey General Commander-in Chief Australian Military Forces
Further Articles expanding on A R Tolmer’s WWII experiences.
FOOTNOTES
1 The Militia was intended to be trained as a domestic defensive force but as war went on became an integral part of the Army.
2 Wikipedia 49th Battalion
3 Extract from Military Cross citation 28 December 1943.
4 Australian War Memorial (AWM) web site, War Histories, 49th Battalion and ‘Always Faithfull’ The History of the 49th Australian Infantry Battalion by Fred Cranston pages 179-180
5 Cranston page 182